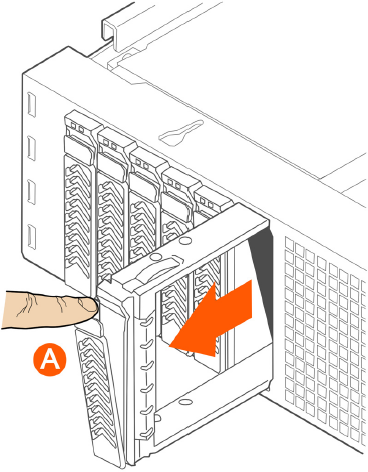
Follow these steps to remove a hard disk drive carrier from the chassis.
-
Remove the front bezel (see Removing the Front Bezel).
-
Select the drive bay where you want to install or replace the drive.
Drive bay 0 must be used first, then drive bay 1 and so on. The drive bay numbers
are printed on the front panel below the drive bays.
-
Remove the drive carrier by pressing the green button to open the lever.
(See A in Figure 155).
-
Pull the drive carrier out of the chassis.
Figure 155
Removing the drive carrier

