Creating an AP DHCP Pool
Creating a DHCP pool is necessary for assigning IP addresses to clients. Multiple address pools can be created and assigned to APs that are running DHCP services. Then, when a client connects to the wireless network, it will be assigned an address from the DHCP pool(s) you specified.
To configure a DHCP pool for IP address allocation:
-
Click
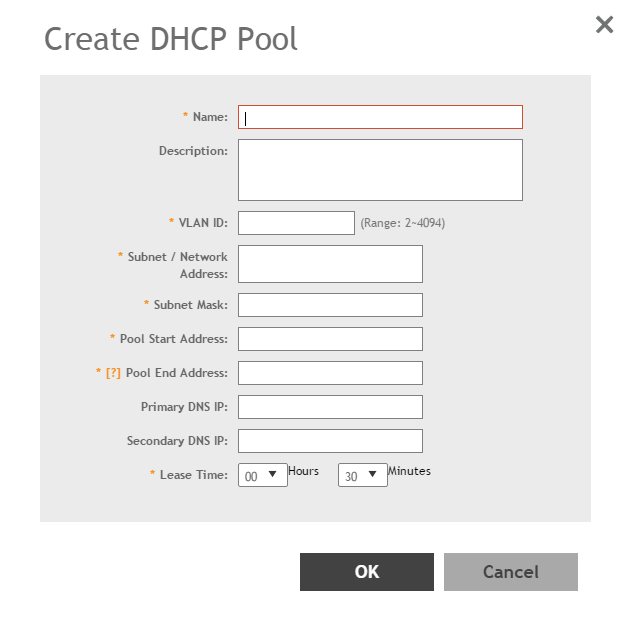
Create.
The Create DHCP Pool page appears.Figure 182 Creating a DHCP Pool
You have created a DHCP address pool. You can now apply this address pool to a DHCP service, as described in
Configuring AP-based DHCP Service Settings.
NOTE
You can also edit, clone and delete the address pool by selecting the options
Configure,
Clone and
Delete respectively, from the
Pool tab.