Creating Reports
You can create reports to obtain a historical view of the maximum and minimum number of clients connect to the system, to view client number at different time intervals and to view the traffic statistics of switches.
To create a new report:
- From the left pane, select
Report >
Report Generation.
Figure 174 appears.
Figure 174 Report Generation Screen

- Click
Create,
Figure 175 appears.
Figure 175 Create Reports Screen
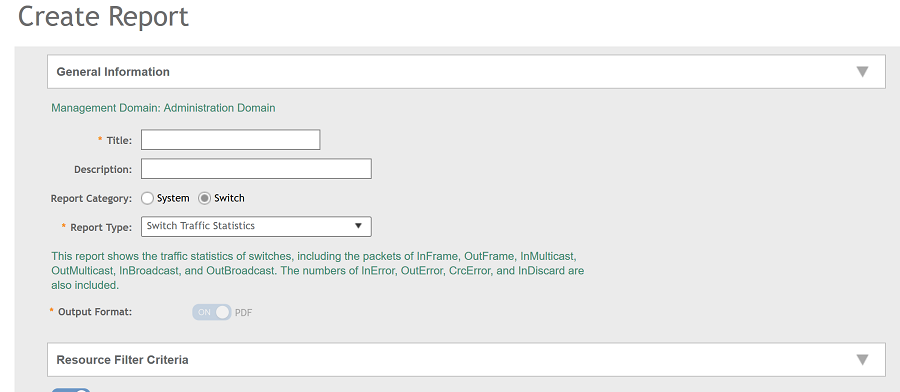
- Enter the required parameters as explained in Table 40.
- Click OK.
| Field | Description | Your Action |
|---|---|---|
| General Information | ||
| Title | Indicates the report name. | Enter a title for the report. |
| Description | Describes the report type. | Enter a short description. |
| Report Category | Provides an option to generate reports for System or Switch devices in the network. | Select System or Switch as appropriate. |
| Report Type | Specifies the report type | Select the required report. |
| Output Format | Specifies the report output format. | Select the required report output format. |
| Resource Filter Criteria | ||
| Device | Indicates the level of resource filtering for which you want to generate the report. For example: Management Domains, AP Zone or Access Point (if you select System option) and Switch. | Enter the device/switch name or select the device/switch from the list and choose the option. |
| SSID | Indicates the SSID for which you want to generate the report. | Select the check box and choose the SSID for which you want the report. You can select All SSIDs to generate reports for all the SSIDs available. This option is convenient as you do not have to update the resource filter criteria periodically. |
| Radio | Indicates the frequency for which you want to generate the report. | Select the check box and choose the required frequency:
|
| Time Filter | ||
| Time Interval | Defines the time interval at which to generate the report. | Select the required time interval. |
| Time Filter | Defines the time duration for which to generate the report. | Select the required time filter. |
| Schedules | ||
| Enable/Disable | Specifies the scheduled time when a report must be generated. By default, the current system time zone is also displayed. | By default the option is disabled. Select Enable and select the Interval, Hour and Minute. You can add multiple schedules. You can also click Add New to include more schedules. |
| Email Notification | ||
| Enable/Disable | Triggers an email notification when the report is generated. | By default the option is disabled. Select Enable and click the Add New and enter the email address. You can add multiple email addresses. |
| Export Report Results | ||
| Export Report Results, Enable/Disable | Uploads the report results to an FTP server. | By default the option is disabled. Select Enable and select the FTP Server. Click Test to ping the FTP server and test if you are able to establish a connection. |
NOTE
You can also edit or delete a report by selecting the options
Configure or
Delete respectively.