Creating Bonjour Fencing Policies
Bonjour Fencing policies can be created and applied to a zone at the same time using the Fencing tab on the Services and Profiles > Bonjour screen.
NOTE
Bonjour Fencing for a particular service does not work if another service from same server which is not fenced is enabled simultaneously.
To create a Bonjour Fencing policy:
-
Click
Create.
The Create Bonjour Fencing Policy page appears.Figure 184 Creating a Bonjour Fencing Policy
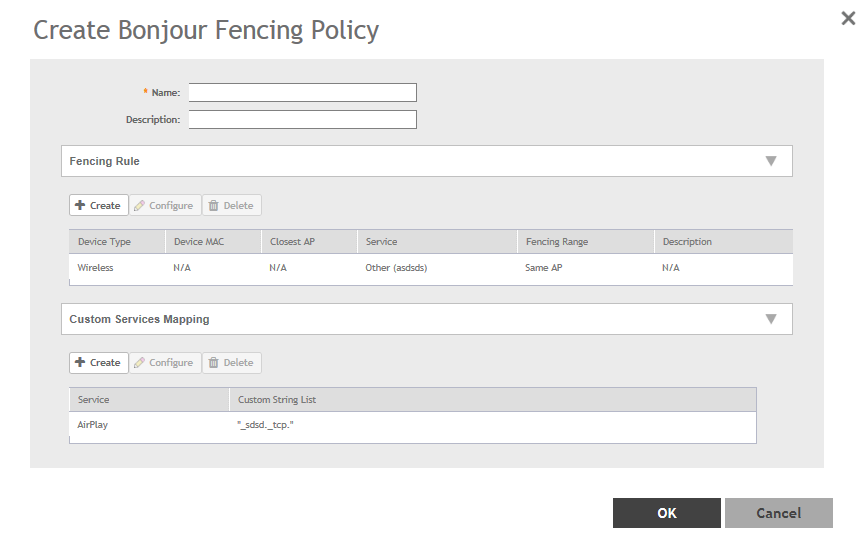
-
Configure the following:
- Name: Type a name for the policy.
- Description: Type a description for the policy.
-
Fencing Rule: Create the policy rule by configuring the following:
Figure 185 Fencing Rule
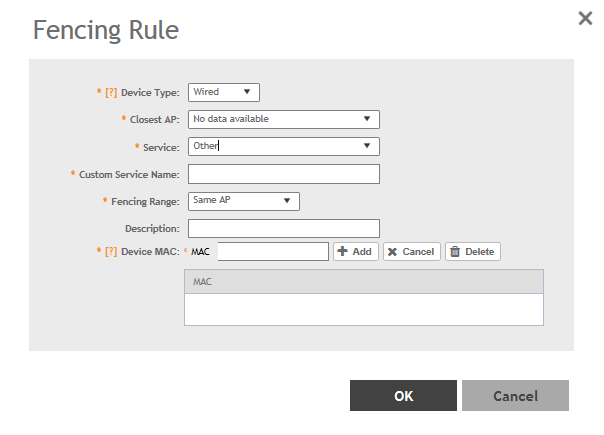
- Click Create. The Fencing Rule page appears.
- Configure the following options:
- Device Type: Select the Wireless or Wired network connection method for the device advertising bonjour services.
- Closest AP: Select the closest AP to create a physical anchor point for fencing, and the closest AP is auto-detected for wireless devices, based on the AP association.
- Service: Select one of the bonjour services from the drop-down list. In 5.0, two new services, Chromecast and Other are added. Chromecast behaves as the standard service. If you select Other, the Custom Service Name appears which is used for service mapping. Regardless of the device type selected only three services for Other option.
- Custom Service Name: For mapping services other than the custom services regardless of the Device Type. You can create a maximum of three service with the same custom service name.
- Fencing Range: Select the fencing range to be the Same AP or 1-Hop AP Neighbors.
- Description: Specify any notes you may need to refer.
- Device MAC: Specify the MAC address of the device advertising bonjour services. This option is available only for Wired Device Type. It supports up to four wired MAC addresses.
- Click
OK to save the rule.
You have created a Bonjour fencing rule. Each policy can contain up to 32 rules.
-
Custom Services Mapping: Create services mapping by configuring the following:
Figure 186 Create Custom Services Mapping

- Click Create. The Custom Services Mapping page appears.
- Configure the following options:
- Service: Select one of the Bonjour services from the drop-down list.
Per Service, has only one entry for Custom Services Mapping. For example: AppleTV and Chromecast, have only one entry with custom strings (three at most) and Other type has one entry with custom strings (three at most) because it allows three Other rules.
- Custom Service Name: Lists all Custom Service Name with Service type Other created in the Fencing Rule. This field is available if you select the Other option from the Service drop-down.
- Custom String List: Enter the name in the format _xxxx._xtcp or _xxxx._xudp. You can create only one entry for Custom service and three entries for other service.
- Service: Select one of the Bonjour services from the drop-down list.
- Click
OK to save the services mapping policy.
You have created a Custom Services Mapping policy.
- Click OK to save the policy.
You have created a Bonjour fencing policy.
NOTE
You can also edit or delete the policy by selecting the options
Configure or
Delete respectively, from the
Fencing tab.