Creating TTG+PDG Forwarding Profiles

A TTG+PDG forwarding profile defines the gateway and tunnel configurations for core network GTP tunnels and LBO configurations.

NOTE
This feature is available only in vSZ-H.
Follow these steps to add a TTG+PDG profile:
  1. Go to Services & Profiles > Core Network Tunnel.
  2. Select the TTG+PDG tab, and then select the zone for which you want to create the profile.
  3. Click Create.
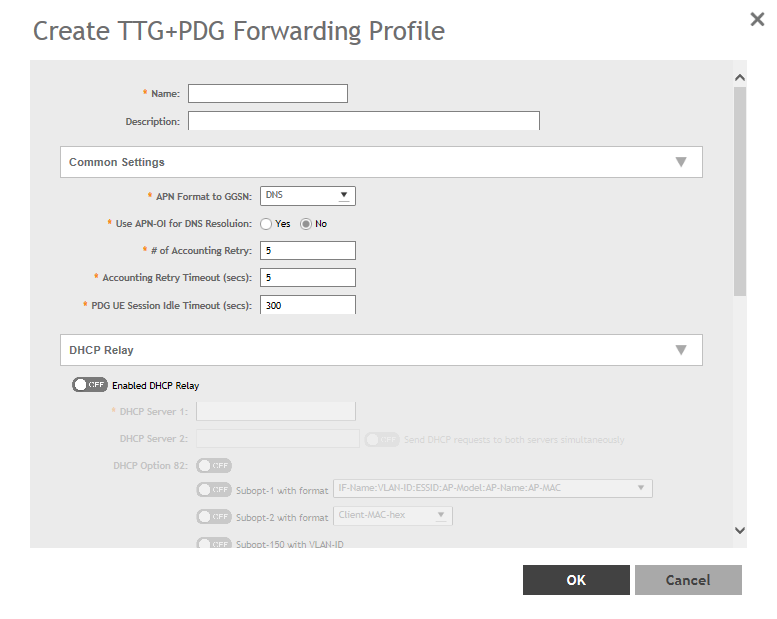
    The Create TTG+PDG Forwarding Profile page appears.
    Figure 148  Creating a TTG+PDG Forwarding Profile

  4. Configure the following:
    1. Name: Type a name for the profile that you are creating.
    2. Description: Type a brief description for the profile.
    3. Common Settings
      1. APN Format to GSN: Select either DNS or String from the drop-down list.
      2. APN-OI for DNS Resolution: Specify if the APN-OI is required.
      3. # of Accounting Retry: Specify the interval (in minutes) at which the controller will recheck the primary TTG+PDG RADIUS profile, if it is available. The default interval is 5 minutes.
      4. Accounting Retry Timeout (secs): Type the timeout period (in seconds) after which an expected response message is considered to have failed.
      5. PDG UE Session Idle Timeout (secs): Type the timeout period (in seconds) after which an expected response message is considered to have failed.
    4. DHCP Relay: Select the Enabled DHCP Relaybutton to enable the DHCP relay agent in the controller and configure the DHCP server IP address and DHCP option 82 settings.
      1. DHCP Server 1: Type the IPv4 address of the DHCP server that will allocate IP addresses to DHCP clients.
      2. DHCP Server 2: If a secondary DHCP server exists on the network, type the IPv4 address of the secondary server.
      3. DHCP Option 82: Select this check box if you want the DHCP relay agent (in this case, the controller) to insert specific identification information into requests that are forwarded to the DHCP server. If you enabled DHCP Option 82, you can configure the following Option 82 sub-options by selecting the corresponding check boxes:
        • Subopt-1 with format: You can customize sub-option 1 (Circuit ID) to send only the AP’s MAC address in hexadecimal format or the MAC address and ESSID. The default format is: IFName:VLAN-ID:ESSID:AP-Model:AP-Name:AP-MAC.
        • Subopt 2 with format: You can customize sub-option 2 (Remote ID), which sends the client’s MAC address by default, to send the AP’s MAC address, or the client MAC plus ESSID or AP MAC plus ESSID.
        • Subopt-150 with VLAN ID: This sub-option encapsulates the VLAN ID.
        • Subopt-151 with format: This sub-option can encapsulate either the ESSID or a configurable Area Name.
    5. Forwarding Policy per Realm, specify the forwarding policy for each realm in the table.

      Configure the following:

      • APN
      • APN Type
      • Route Type
      • Profile Name
    6. In Default APN Settings, configure the following:
      • No Matching Realm Found
      • No Realm Specified
    7. In Default APN per Realm, configure the following:
      • Realm
      • Default APN
    8. Click OK.
You have created the TTG+PDG forwarding profile.
NOTE
You can also edit and delete the profile by selecting the options Configure and Delete respectively, from the TTG+PDG tab.