Complete the following steps to configure a split tunnel profile:
-
Select
.
-
Select the
Split Tunnel tab, and then select the zone for which you want to create the profile.
-
Click
Create.
The
Create Split Tunnel Profile window is displayed.
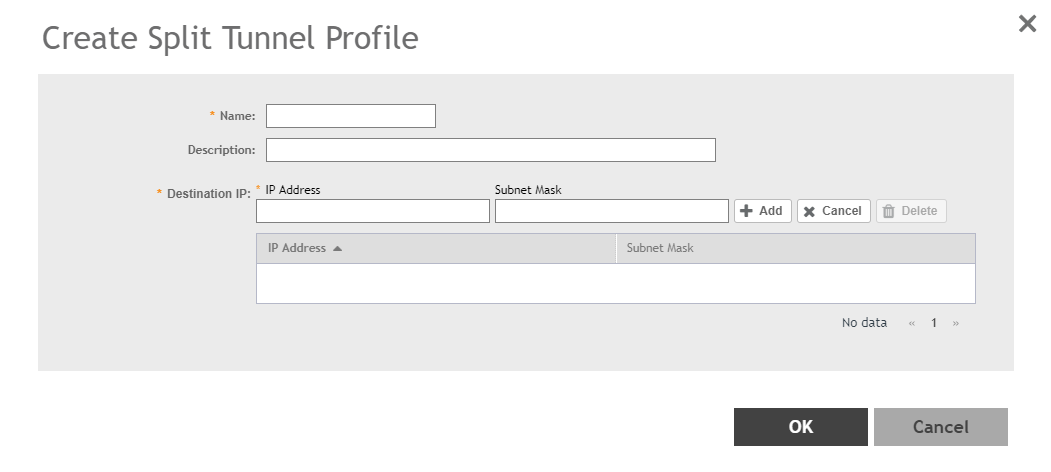
Figure 161
Creating a Split Tunnel Profile
-
Enter the split tunnel profile information:
NOTE
RuckusGRE or SoftGRE must be enabled on the WLAN before mapping it to a Split Tunnel Profile.
- In the
Name field, type a name for the split tunnel profile.
- In the
Description field, type a short description for the split tunnel profile.
- In the
IP Address field, enter the destination IP address.
- In the
Subnet Mask field, enter the destination IP subnet mask.
- Click
Add to add the destination IP details.
- Click
OK.
NOTE
You can also edit, clone or delete the profile by selecting the options
Configure,
Clone, and
Delete respectively from the
Split Tunnel tab.