You can classify the voice packets in a WiFi call based on the carrier, by creating a WiFi calling profile.
-
Go to
.
-
Click
Create.
The
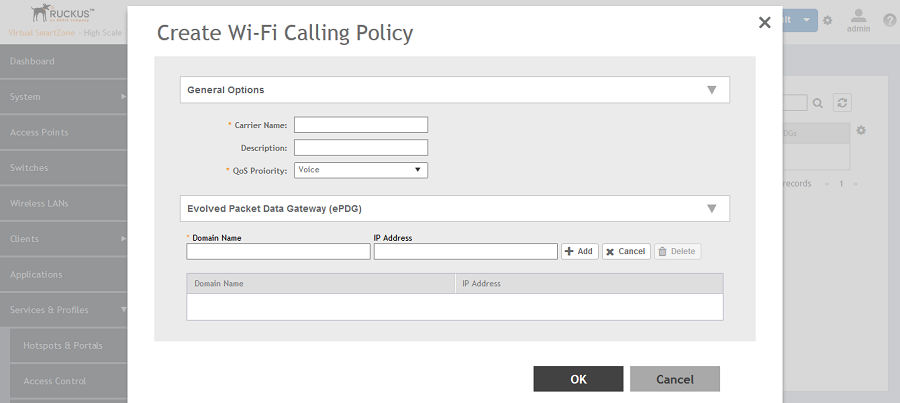
WiFi Calling Profile page appears.
Figure 143
Creating a WiFi Calling Profile
-
In
General Options, configure the following:
Carrier Name: Type the name of the carrier based on which you want to create a rule to prioritize the voice calls
Description: Provide a brief description about the profile
QoS Priority: From the drop-down menu, select the Quality of Service feature based on which you want to prioritize the calls
-
In
Evolved Packet Data Gateway (ePDG), configure the following:
Domain Name: Type the domain name. For example, epdg.epc.att.net
IP Address (optional): Type the IP address for the domain. Providing the IP address enables better WiFi calling QoS during roaming.
-
Click
Add
to include the domain.
The AP will verify the domain IP address before qualifying the WiFi call.
-
Click
OK .
The WiFi calling profile is created and displayed with its name, QoS priority, number of ePDGs associated and management domain.
NOTE
You can edit, clone and delete the profile by clicking
Configure,
Clone and
Delete, respectively.