Creating Account Security
Creating an account security profile enables end-users to control administrative accounts to better manage admin accounts, passwords, login, and DoS prevention.
-
Click
Create.
The
Create Account Security page appears.
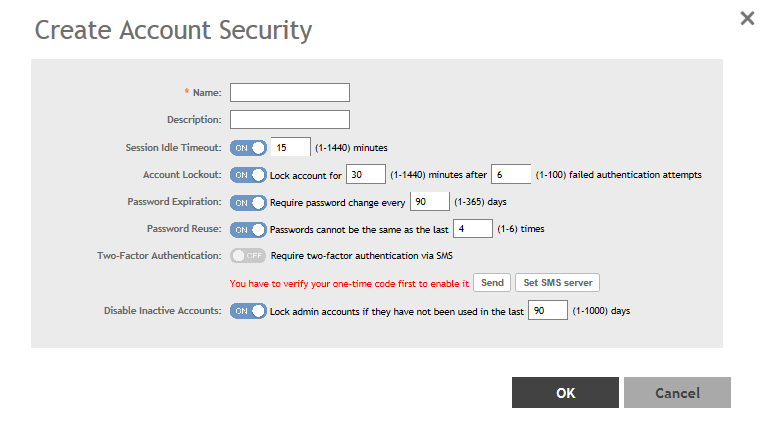
Figure 217 Creating Account Security
-
Configure the following:
- Name: Type the name of the security profile that you want to create.
- Description: Provide a short description for the profile.
- Session Idle Timeout: Click the button and enter the timeout duration in minutes.
- Account Lockout: You can configure the security profile to lock the account based on the duration of the session or number of failed attempts to access the account. Provide the values as necessary. Click the button in order to enable the feature.
- Password Expiration: Click the button and type the number of days for which the account's password will be valid. After the configured number of days, the password will expire and render the account inaccessible. You must change the password before the expiration day to have continued access to the account. By default, the password is valid for a period of 90 days. It can be configured for validity from a minimum of 1 day, to a maximum of 365 days.
If your password has expired, you will be prompted to change or reset your password as soon as you login. Reset the password as shown in the figure.Figure 218 Resetting the old password

- Password Reuse: Prevents the reuse of passwords. Click the button to enable this option. By default, the value is 4 (last 4 passwords cannot be reused).
-
Two-Factor Authentication: Provides username/password authentication and SMS authentication. To enable this option, click the button. You must have configured the SMS Gateway.
When a network admin logs in using the credentials, a prompt to enter a one-time SMS code appears. The SMS system generates a one-time code and sends it to the admin's phone number. Once the admin enters this SMS code access to the system is granted.
- Disable Inactive Accounts: Locks the admin user IDs that are inactive for the specified period of time. Click the button and specify the number of days.
- Click OK.
From Global Security, you can select the check-box to enable Captcha for Login. The captcha feature provides additional security to ensure a human is signing into the account, and not a robot. If this feature is enabled; when you login to the web interface, the captcha characters are displayed in the login page as shown.Type the characters as shown in the captcha picture and login. The characters in the captcha image are case sensitive and can be refreshed if not clear.Figure 219 Captcha enabled in the login page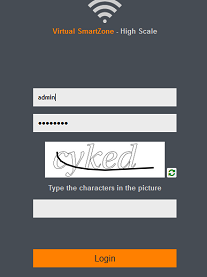
You have created the account security profile.
With new enhancements to account security, SmartZone has a complete feature set to make PCI compliance very simple and straightforward. In addition to local PCI enforcement settings, SmartZone also integrates with SCI for reporting and analytics. SCI version 5.0 and above supports a PCI compliance report, which is based on the relevant PCI-related configuration settings throughout SmartZone. To facilitate the SmartCell Insight PCI report, the SmartZone is capable of sending the following information to SCI:
- Configuration messages as separated GPB messages.
- WLAN configuration
- Default configuration changes
- Controller information which identifies the SZ model
- Encryption details of communication, for example: CLI, SSH, telnet, Web, API.
- Inactive user IDs and session timeout
- Authentication mechanism enforced on user IDs.
- Enforcement of password.
- Supported mechanism on SZ that can be provided to SCI.
- User IDs that are locked after failed attempts.
- Authentication credentials that are unreadable and encrypted during transmission.
- Enforcement of password standards.
- Disallowing duplicate password feature is enabled.
- If rogue AP detection is enabled on each AP.
To learn more about SCI and the PCI compliance report it provides, check the product page (https://www.ruckuswireless.com/products/smart-wireless-services/analytics) and documentation on Ruckus support (https://support.ruckuswireless.com.