Creating an AP Zone
An AP zone (or zone) functions as a way of grouping Ruckus APs and applying settings, including WLANs to these groups of Ruckus APs.
- On the menu, click
Access Points.
Figure 36 Access Points Page
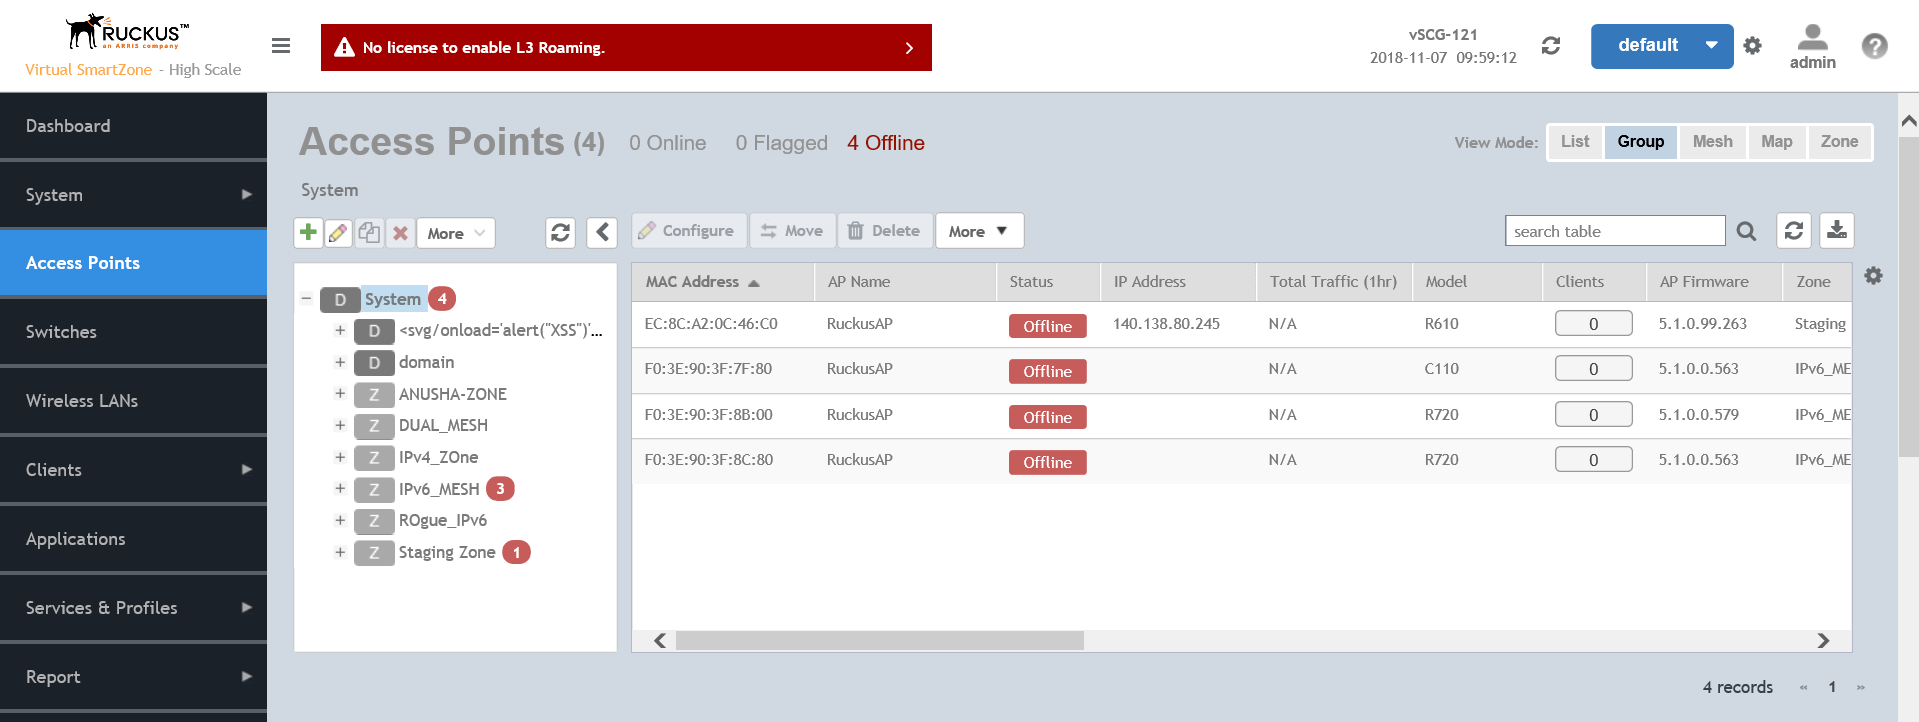
- From the
System tree hierarchy, select the location where you want to create the zone (for example, System or Domain), and click
 .
Figure 37 Create Groups Page
.
Figure 37 Create Groups Page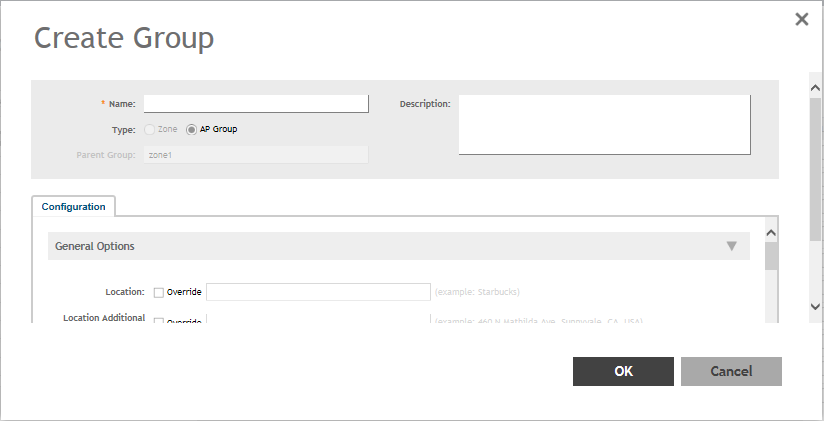
- Configure the zone by completing the settings listed in the table below.
Table 9 AP Zone Details Field Description Your Action Name Indicates the name of the zone/AP group. Enter a name. Description Indicates the short description assigned to the zone or AP group. Enter a brief description Type Indicates if you are creating a domain, zone or an AP group. Appears by default. You can also choose the option. Parent Group Indicates the parent AP group. Appears by default. AP Firmware Indicates the firmware to which it applies. Select the firmware. Country Code Indicates the country code. Using the correct country code helps ensure that APs use only authorized radio channels. Select the country code. Location Indicates the generic location of the zone. Enter the location. Location Additional Information Indicates detailed location. Enter additional location information. GPS Coordinates Indicates the geographical location. Enter the following coordinates: - Longitude
- Latitude
- Altitude
AP Admin Logon Indicates the admin logon credentials. Enter the Logon ID and Password. AP Time Zone Indicates the time zone that applies. Select a time zone, and the enter the details as required. AP IP Mode Indicates the IP version that applies. Select the IP version. IPv6, IPv4 and dual addressing modes are supported. Historical Connection Failures Allows the zone APs to report client connection failures so that the administrator can view past connection problems from the Troubleshooting menu. Click the button. SSH Tunnel Encryption Specifies the encryption that reduces the load on controller control of SSH traffic. Select the required option: - AES 128
- AES 256
Enable mesh networking in this zone Enables managed APs to automatically form a wireless mesh network, in which participant nodes (APs) cooperate to route packets.
Dual band APs can only mesh with other dual band APs, while single band APs can only mesh with other single band APs.
Click the button. Zero Touch Mesh Enables a new AP to join the network using wireless connection. Click the button. Mesh Name (ESSID) Indicates the mesh name.
Type a name for the mesh network. Alternatively, do nothing to accept the default mesh name that the controller has generated. Mesh Passphrase Indicates the passphrase used by the controller to secure the traffic between Mesh APs.
Type a passphrase that contains at least 12 characters. Alternatively, click Generate to generate a random passphrase with 32 characters or more. Mesh Radio Option Indicates the channel range configured.
Select the channel option: 2.4 GHz or 5 GHz. Channel Range (2.4G) Indicates that you want to override the 2.4GHz channel range that has been configured for the zone to which this AP group belong. Select Select Channel Range (2.4G) check boxes for the channels on which you want the 2.4GHz radios of managed APs to operate. Channel options include channels 1 to 11. By default, all channels are selected. DFS Channels Allows ZoneFlex APs to use DFS channels. Click to enable the option. Channel 144 Provides channel 140 and 144 support for 11ac and 11ax APs. Enabling this option supports 20 MHz, 40 MHz, or 80 MHz channel modes. The 80+80 MHz and 160 MHz modes are supported if the AP supports these modes. Disabling this option provides Channel 140 support only to 20 MHz mode .
NOTEThis option is available for selection only if you enable the DFS Channels option.NOTEThis feature is currently supported only in the United States.Click to enable the option. 5.8 Ghz Channels Provides C-band support for all Outdoor APs and the following Indoor APs: R310, R510, R710 . NOTEThis feature is available only for countries that support 5.8Ghz channel. For example, UK provides indoor AP—5.8Ghz channel support.
Select the Allow 5.8Ghz channels check box. 5.8 Ghz Channels License Enables full TX Power Adjustment for C-band channels. NOTEThis feature is supported only for UK.Select the Allow 5.8Ghz channels use full power check box. Channel Range (5G) Indoor Indicates the channels on the 5GHz radio that you want managed indoor APs to operate. Select the check boxes. Channel Range (5G) Outdoor Indicates the channels on the 5GHz radio that you want managed outdoor APs to operate. Select the check boxes. Radio Options b/g/n (2.4 GHz) Indicates the configuration options for the 2.4 GHz radio. Select the following options: - Channelization—Set the channel width used during transmission to either 20 or 40 (MHz), or select Auto to set it automatically.
- Channel—Select the channel to use for the b/g/n (2.4GHz) radio, or select Auto to set it automatically.
-
Auto cell sizing— Select this option to enable APs to share information on interference seen by each other and dynamically adjust their radio Tx power and Rx parameters to minimize interference. Enabling this option, disables the TX Power Adjustment configuration.
NOTEEnsure that Background Scan is enabled.
-
TX Power Adjustment—Select the preferred TX power, if you want to manually configure the transmit power on the 2.4GHz radio. By default, TX power is set to
Full on the 2.4GHz radio.
NOTEIf you choose Min, the transmit power is set to 0dBm (1mW) per chain for 11n APs, and 2dBm per chain for 11ac APs. If you choose Max, the transmit power is set to the max allowable value according to the AP's capability and the operating country's regulations.
Radio Options a/n/ac (5 GHz) Indicates the configuration options for the 5 GHz radio. Select the following options: - Channelization—Set the channel width used during transmission to either 20, 40, 80, 80+80, 160 (MHz), or select Auto to set it automatically.
- Channel—For Indoor and Outdoor, select the channel to use for the a/n/c (5GHz) radio, or select Auto to set it automatically.
- Secondary Channel (80+80)—For Indoor and Outdoor, the default secondary channel to use for the a/n/c (5GHz) radio, is set as Auto.
-
Auto cell sizing— Select this option to enable APs to share information on interference seen by each other and dynamically adjust their radio Tx power and Rx parameters to minimize interference. Enabling this option, disables the TX Power Adjustment configuration.
NOTEEnsure that Background Scan is enabled.
-
TX Power Adjustment—Select the preferred TX power, if you want to manually configure the transmit power on the 5GHz radio. By default, TX power is set to
Full on the 5GHz radio.
NOTEIf you choose Min, the transmit power is set to 0dBm (1mW) per chain for 11n APs, and 2dBm per chain for 11ac APs. If you choose Max, the transmit power is set to the max allowable value according to the AP's capability and the operating country's regulations.
Ruckus GRE Profile Indicates the GRE tunnel profile. Choose the GRE tunnel profile from the drop-down. Ruckus GRE Forwarding Broadcast Forwards the broadcast traffic from network to tunnel. Click the option to enable forwarding broadcast. Soft GRE Profiles Indicates the SoftGRE profiles that you want to apply to the zone. - Click the Select checkbox, a form is displayed.
- From the Available Profiles, select the profile and click the -> icon to choose it.
You can also click the + icon to create a new SoftGRE profile.
- Click OK.
IPsec Tunnel Mode Indicated the tunnel mode for the Ruckus GRE and SoftGRE profile. Select an option: - Disable
- SoftGRE
- Ruckus GRE
IPsec Tunnel Profile Indicates the tunnel profile for SoftGRE. NOTESelect the same tunnel type for IPsec tunnel profile in WLAN configuration.Choose the option from the drop-down. Enable external syslog server for APs Indicates if an external syslog server is enabled. Select the check box and update the following details for the AP to send syslog messages to syslog server. If the primary server goes down, the AP send syslog messages to the secondary server as backup: - Primary Server Address
- Secondary Server Address
- Port for the respective servers
- Portocol: select between UDP and TCP protocols
- Event Facility
- Priority
- Send Logs: you can choose to send the General Logs, Client Logs or All Logs
Enable AP SNMP Indicates if the AP SNMP option is enabled. Select the check box. SNMPv2 Agent Indicates if the SNMPv2 agent is enabled. If the SNMPv2 agent is enabled, configure the community settings. - Click Create and enter Community.
- Select the required Privilege. If you select Notification enter the Target IP.
- Click OK.
SNMPv3 Agent Indicates SNMPv3 Agent is applied. If the SNMPv3 agent is enabled, configure the community settings. - Click Create and enter User.
- Select the required Authentication.
- Enter the Auth Pass Phrase.
- Select the Privacy option.
- Select the required Privilege. If you select Notification select the option Trap or Inform and enter the Target IP and Target Port.
- Click OK.
Enable DHCP Service in this zone Enables the DHCP service for this zone. Select the check box. LTE Band Lock Displays the list of LTE bands (4G/3G) and allows you to lock one or more bands from the list. Once a lock is enabled, the connection is established only to the specified bands. NOTEThe list of bands is only applicable to:- Domain
- USA
- Canada
- Japan
Select the check box and choose the band from: - Primary Sim
- Secondary Sim
Channel Mode Indicates if location-based service is enabled. If you want to allow indoor APs that belong to this zone to use wireless channels that are Channel Mode regulated as indoor-use only. Select the Allow indoor channels check box. Auto Channel Selection Indicates auto-channel settings. Select the check box and choose the option. Background Scan Runs a background scan. Select the respective check boxes and enter the duration in seconds: - Background Scanning—Changes the AP channel if there is interference.
- ChannelFly—Continuously monitors potential throughput and changes the AP channel to minimize interference and optimize throughput.
Smart Monitor Indicates AP interval check and retry threshold settings. Select the check box and enter the interval and threshold. AP Ping Latency Interval Measures the latency between the controller and AP periodically, and send this data to SCI Enable by moving the radio button to ON to measure latency. AP Management VLAN Indicates the AP management VLAN settings. Choose the option. Click VLAN ID, and then type the VLAN ID that you want to assign (valid range is from 1 to 4094). To keep the same management VLAN ID that has been configured on the AP, click Keep AP's settings. ATTENTIONFor standalone APs, set the AP ethernet port to trunk before changing the AP Management VLAN settings.Rogue AP Detection Indicates rogue AP settings. Enable the option. Rogue Classification Policy Indicates the parameters used to classify rogue APs. This option is available only if you enable the Rogue AP Detectionoption. Select the options for rogue classification policy:
-
- Enable events and alarms for all rogue devices
- Enable events and alarms for malicious rogues only
- Report RSSI Threshold - enter the threshold. Range: 0 through 100.
- Protect the network from malicious rogue access points - Enable the option and choose one of the following:
- Aggressive
- Auto
- Conservative
- Radio Jamming Detection - enable the option and enter the Jamming Threshold in percentage.
DoS Protection Indicates settings for blocking a client. Select the check box and enter the duration in seconds. Client Load Balancing Balances the number of clients across APs. Select the check box and enter the threshold. Band Balancing Balances the bandwidth of the clients. You can use the slider to actively control associated stations to meet certain band distribution requirements allowing for dynamic band balancing: - Disable: disables band balancing
- Basic (default): during heavy load conditions, this option withholds probe and authentication responses in order to balance clients.
- Proactive: this is a dynamic form of band balancing where the clients are re-balanced on the AP utilizing the 802.11v BTM standard. The AP sends a BTM message to the client to change the bands and it is left to the client's discretion to make a decision on changing the bands.
- Strict: this is an aggressive form of band balancing where the clients are forced to re-balance utilizing the 802.11v BTM standard. The AP sends a BTM message to the client to change the bands. If the client does not change the band, the client is forced to disconnect after 10 seconds.
Enter the percentage of client load on the 2.4 GHz band.NOTEThe band change is applicable only for those connected clients that support 802.11v standard.Location Based Service Indicates that the location based service is enabled. - Select the check box and choose the options.
- Click Create, In the Create LBS Server form:
- Enter the Venue Name.
- Enter the Server Address.
- Enter the Port number.
- Enter the Password.
Client Admission Control Indicates the load thresholds on the AP at which it will stop accepting new clients. Select the check box and update the following settings: - Min Client Count
- Max Radio Load
- Min Client Throughput
Protection Mode Indicates the mechanism to reduce frame collision.
Choose one of the following options: - None
- RTS/CTS
- CTS Only
AP Reboot Timeout Indicates the AP reboot settings. Choose the required option for: - Reboot AP if it cannot reach default gateway after
- Reboot AP if it cannot reach the controller after
Recovery SSID Allows you to enable or disable the Recovery(Island) SSID broadcast on the controller. Enable Recovery SSID Broadcast - Click OK.
 , Clone
 or Delete
 respectively, from the Access Points page.