Creating a WLAN Configuration
To create a WLAN configuration:
Specifies the server used for
authentication on this network.
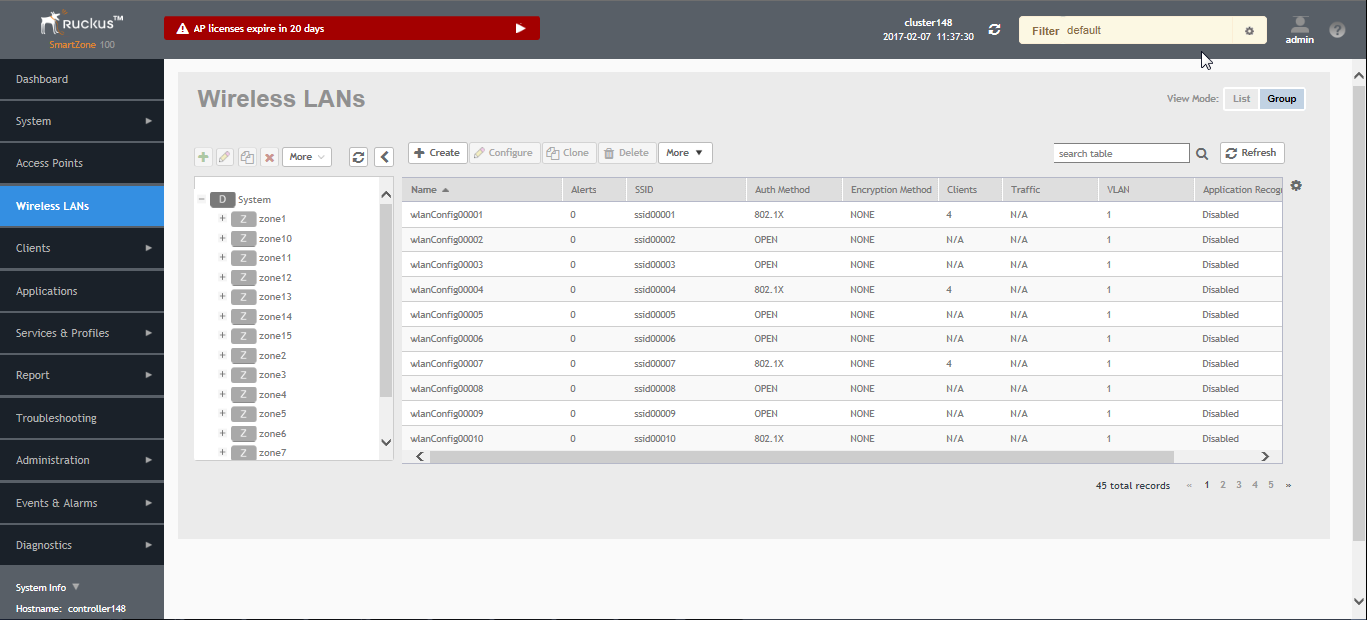
- In the Wireless LANs page, as shown in the figure below, from the
System tree hierarchy, select the
Zone where you want to create a WLAN.
Figure 37 Wireless LANs
- Click
Create. The below appears.
Figure 38 Create WLAN Configuration
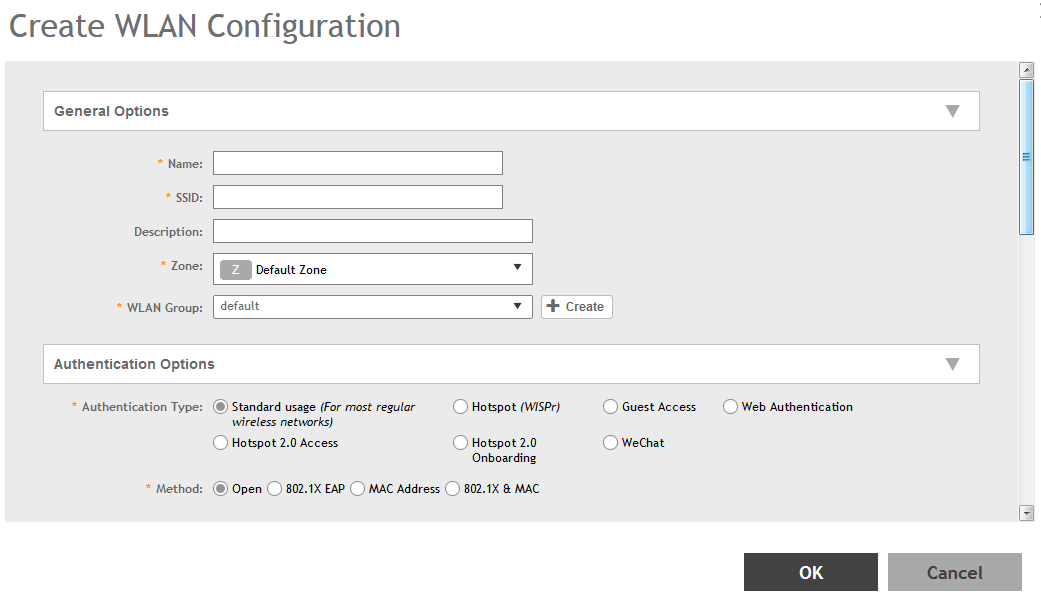
- Set the required configurations as explained in the table below.
- Click OK.
| Field | Description | Your Action |
|---|---|---|
| General Options | ||
| Name | Indicates the user-friendly administrative name for the WLAN. | Enter a name. |
| SSID | Indicates the SSID for the WLAN. | Enter the SSID |
| Description | Indicates a user-friendly description of the WLAN’s settings or function. | Enter a short description. |
| Zone | Indicates the zone to which the WLAN belongs. | Select the Zone to which the WLAN settings apply. |
| WLAN Groups | Indicates the WLAN group(s) to which the WLAN applies. | Select the WLAN Groups. |
| Authentication Options | ||
| Authentication Type | Defines the type of authentication flow for the WLAN.
NOTE Authentication types such as WeChat, Web Authentication and Guest Access are not supported by APs in IPv6 mode.
|
Select the required option:
|
| Authentication Options | ||
| Method | Specifies the authentication mechanism. | Select the following option:
|
| Encryption Options | ||
| Method | Specifies the encryption method.
WPA and WPA2 are both encryption methods certified by the Wi-Fi Alliance; WPA2 with AES is the recommended encryption method. The Wi-Fi Alliance will be mandating the removal of WEP due to its security vulnerabilities, and Ruckus recommends against using WEP if possible. |
Select the option:
|
| Data Plane Options | ||
| Access Network | Defines the data plane tunneling behavior. |
|
| vSZ-D DHCP/NAT | Enables tunneling option for DHCP/NAT. | Select the required check boxes:
|
| RADIUS based DHCP/NAT | Enables RADIUS-based DHCP/NAT settings. DHCP server authorizes remote clients and allocates addresses based on replies from a RADIUS server. | Select the required check boxes:
|
| Authentication & Accounting Server (for WLAN Authentication Type: Standard usage ) | ||
| Authentication Server | Specifies the server used for authentication on this network. By enabling Proxy, authentication requests will flow through the controller. In a non-proxy mode, the AP will communicate directly with the authentication server without going through the controller. |
|
| Accounting Server | Specifies the server used for accounting messages. By enabling Proxy, accounting messages are sent by the controller. In a non-proxy mode, the AP will communicate accounting messages directly. |
|
| Hotspot Portal (for WLAN Authentication Type: Hotspot (WisPr)) | ||
| Hotspot (WISPr) Portal | Defines hotspot behavior, like redirects, session timers, and location information, among others. | Select the hotspot portal profile that you want this WLAN to use. |
| Bypass CNA | Bypasses the Apple CNA feature on iOS and OS X devices that connect to this WLAN. | Select the Enable check box. |
| Authentication Server | Indicates the authentication server that you want to use for this WLAN. | Choose the option. Options include Local DB, Always Accept, and any AAA servers that you previously added. Additionally, if you want the controller to proxy authentication messages to the AAA server, select the Use Controller as Proxy check box. |
| Accounting Server | Indicates the RADIUS Accounting server that you want to use for this WLAN. | Choose the option. You must have added a RADIUS Accounting server previously. Additionally, if you want the controller to proxy accounting messages to the AAA server, select the Use the Controller as Proxy check box. |
| Guest Access Portal (for WLAN Authentication Type: Guest Access) | ||
| Guest Portal Service | Indicates the guest access portal to be used on this WLAN. | Choose the guest portal service. |
| Bypass CNA | Bypasses the Apple CNA feature on iOS and OS X devices that connect to this WLAN. | Select the Enable check box. |
| Guest Authentication | Manages guest authentication. | Select:
|
| Guest Accounting | Indicates the RADIUS Accounting server that you want to use for this WLAN. | Choose the server. You must have added a RADIUS Accounting server previously. Additionally, if you want the controller to proxy accounting messages to the AAA server, select the Use the Controller as Proxy check box. |
| Authentication & Accounting Server (for WLAN Authentication Type: Web Authentication) | ||
| Web Authentication Portal | Indicates the web authentication portal to use for this WLAN. | Choose the web authentication portal from the drop-down. |
| Bypass CNA | Bypasses the Apple CNA feature on iOS and OS X devices that connect to this WLAN. | Select the Enable check box. |
| Authentication Server | Indicates the authentication server that you want to use for this WLAN. | Choose the option. Options include Local DB, Always Accept, and any AAA servers that you previously added. Additionally, if you want the controller to proxy authentication messages to the AAA server, select the Use the Controller as Proxy check box. |
| Accounting Server | Indicates the RADIUS Accounting server that you want to use for this WLAN. | Choose the server. You must have added a RADIUS Accounting server previously. Additionally, if you want the controller to proxy accounting messages to the AAA server, select the Use the Controller as Proxy check box. |
| Hotspot 2.0 Profile (for WLAN Authentication Type: Hotspot 2.0 Access) | ||
| Hotspot 2.0 Profile | Indicates the profile, which includes operator and identify provider profiles. | Choose the profile. |
| Authentication Server RFC 5580 | Supports RFC 5580 location delivery on the WLAN, which carries location information in RADIUS exchanges. | Select the check box. |
| Accounting Server Updates | Indicate the frequency to sends interim updates.
Configure the account update interval for accounting servers defined in the Hotspot 2.0 Identity Provider profile. |
Enter the duration in minutes. Range: 0 through 1440. |
| We Chat Portal (for WLAN Authentication Type: We Chat) | ||
| We Chat Portal | Defines the We Chat authentication URL, DNAT destination, and other information. | Select a We Chat portal service. |
| Accounting Server | Indicates the RADIUS Accounting server that you want to use for this WLAN. | Choose the server. You must have added a RADIUS Accounting server previously. Additionally, if you want the controller to proxy accounting messages to the AAA server, select the Use the Controller as Proxy check box. |
| Forwarding Profile ( for WLAN Usage > Access Network) | ||
| Forwarding Policy | Defines special data packet handling to be taken by the data plane when the traffic is tunneled. | Forwarding Profile is Factory Default. It is disabled. |
| Options | ||
| Wireless Client Isolation | Prevents wireless clients from communicating with each other | Click Enable to prevent wireless clients on the same VLAN/subnet from communicating with each other. |
| Isolation Whitelist | Defines wired destinations on the local subnet that can be reached, even if client isolation is enabled. | Select the option. |
| Priority | Determines high vs low transmit preference of one WLAN compared to another. Traffic for high priority WLAN is always sent before low priority WLANs in the same QoS category (background, best effort, video, voice). | Choose the priority:
|
| RADIUS Option | ||
| NAS ID | Defines the ID sent to the RADIUS server, which will identify the AP. | Choose the option:
|
| NAS Request Timeout | Indicates the duration after which an expected RADIUS response message is considered to have failed. | Enter the timeout period (in seconds).
NOTE It is recommended to configure the same values for
NAS Request Timeout,
NAS Max Number of Retries, and
NAS Reconnect Primary.
|
| NAS MAX Number of Retries | Indicates the maximum number of failed connection attempts after which the controller will fail over to the backup RADIUS server. | Enter the maximum number of failed connection attempts.
NOTE It is recommended to configure the same values for
NAS Request Timeout,
NAS Max Number of Retries, and
NAS Reconnect Primary.
|
| NAS Reconnect Primary |
Indicates the time interval after which the controller will recheck if the primary RADIUS server is available when the controller has failed over to the backup RADIUS server. |
Enter the duration in minutes.
Range: 1 through 60 minutes. The default interval is 5 minutes.
NOTE It is recommended to configure the same values for
NAS Request Timeout,
NAS Max Number of Retries, and
NAS Reconnect Primary.
|
| Called Station ID | Indicates the format for the called station ID, which is sent to the RADIUS server as an attribute, and can be used in policy decision | Select a format:
|
| Single Session ID Accounting | Enabling this feature allows the APs to maintain one accounting session for a client roaming between APs. If the client roams from one AP to another, the accounting session ID and stats will be carried while roaming from one AP to the other. If the feature is not enabled, the accounting session ID is re-generated and stats is also reset, essentially resetting the accounting. | Select the Enable check box to use this feature. |
| NAS IP | Indicates the NAS IP address. | Select the option:
|
| Advanced Options | ||
| User Traffic Profile | Defines the traffic policy that will be applied to users on this WLAN. The default UTP allows all with no rate limits. UTPs can define rate limits as well as L3-7 ACLs and policies. | Select the required option. |
| L2 Access Control | Enables the WLAN to blacklist or whitelist a specific set of MAC addresses based on a L2 access control policy. | Select the required option. |
| OS Policy | Enables the WLAN to apply a unique policy to a device based on OS type. Use a precedence profile to determine whether a role-based, AAA-based, or OS-based policy will take precedence. | Select the required option. |
| Application Recognition and Control | Enables DPI-based L7 application recognition, and if enabled, an application control policy. Recognition and control are performed on the AP. | Select the Enable check box. |
| URL Filtering | Enables URL filtering on the WLAN controller to block or allow access to specific web sites or web pages. | Select the Enable check box. |
| Client Fingerprinting | Enables the AP to attempt utilize DHCP fingerprinting to identify client devices by their operating system, device type, and host name. | Select the check box. |
| Access VLAN | Tags the WLAN traffic with a VLAN ID between 2-4094. By default, all client traffic will be assigned to the native (untagged) VLAN on the AP's Ethernet port, which we represent as VLAN ID 1. | Select the check box and enter the VLAN ID. |
| Hotspot 2.0 Onboarding | Allows devices to connect to a WiFi network automatically, where in the service providers engage in roaming partnerships to provide seamless access to WiFi networks. The devices are authenticated using credentials or certificates. | Select the check box to allow Hotspot 2.0 Onboaring for the WISPr WLAN. |
| Hide SSID | Removes the SSID from Beacon frames. By removing the SSID, in most cases, clients will not show this SSID in their scan list unless the device is already configured to connect. This can simplify the network decision for an end user. | Select the check box. |
| Client Load Balancing | Disables client load balancing on this WLAN if the option is selected. | Select the check box to disable client load balancing on this WLAN. |
| Proxy ARP | Enables proxy ARP. When proxy ARP is enabled on a WLAN, the AP provides proxy service for stations when receiving neighbor discovery packets (for example, ARP request and ICMPv6 Neighbor Solicit messages), and acts on behalf of the station in delivering ARP replies. When the AP receives a broadcast ARP/Neighbor Solicit request for a known host, the AP replies on behalf of the host. If the AP receives a request for an unknown host, it forwards the request. | Select the check box. |
| MAX Clients | Limits the number of clients that can associate with this WLAN per AP radio (default is 100). Every connection attempt after this max value will not be permitted to connect. | Enter the number of clients allowed. |
| 802.11d | Adds additional regulatory information to AP beacons and probe responses. This compliance information provides country-specific guidance like permitted channels and transmit power, to ensure that the devices operate within the legal boundaries of the country. 11d is helpful for many devices that cannot independently determine their operating country. | Select the check box to enable this option. |
| 802.11k Neighbor Report | Enhances roaming by providing a list of neighbor APs to the client device. APs build a neighbor AP list via background scanning, and when the client plans to roam, it will request this list from the AP. This list is then used to perform efficient scanning to find a roaming candidate. | Select the check box. |
| Force DHCP | Requires the clients to obtain a valid IP address from DHCP within the specified number of seconds. This prevents clients configured with a static IP address from connecting to the WLAN. Additionally, if a client performs Layer 3 roaming between different subnets, in some cases the client sticks to the former IP address. This mechanism optimizes the roaming experience by forcing clients to request a new IP address. | Select the check box. |
| DHCP Option 82 | Enables an AP to encapsulate additional information (such as VLAN ID, AP name, SSID and MAC address) into the DHCP request packets before forwarding them to the DHCP server. The DHCP server can then use this information to allocate an IP address to the client from a particular DHCP pool based on these parameters. | Select the check box. |
| DHCP Option 82 Format |
Enables an AP to encapsulate additional information (such as VLAN ID, AP name, SSID and MAC address) into the DHCP request packets before forwarding them to the DHCP server. The DHCP server can then use this information to allocate an IP address to the client from a particular DHCP pool based on these parameters. |
Choose the required option:
|
| DTIM Interval |
Indicates the frequency at which the DTIM (Delivery Traffic Indication Message) will be included in Beacon frames. |
Enter the frequency number.
Range: 1 through 255. |
| Directed MC/BC Threshold | Defines the per radio client count at which an AP stops converting group-addressed data traffic to unicast. However, the Directed Threshold logic is only one part of the access points' multicast handling logic, which means there may be other factors that determine whether a frame is transmitted as unicast or multicast. APs support a feature called Directed Multicast (configurable only on AP CLI, enabled by default), which adds additional logic to the multicast flow. If Directed Multicast is disabled, the AP uses the Directed Threshold as the only criteria to determine whether to transmit a multicast packet as unicast. However, when Directed Multicast is enabled, the flow is changed. Directed Multicast is a feature that checks to see if a multicast packet is well-known or not. For well-known multicast packets, for example: Bonjour, uPNP, most IPv6 link- and node-local, Spectralink, the AP still applies the directed-threshold logic to determine conversion to unicast. For non well-known types, the AP monitors and maintains a database of client subscriptions using IGMP and MLD. If associated clients are subscribed to the multicast stream, then the AP always converts these packets to unicast, regardless of the Directed Threshold configuration. If there are no clients subscribed to the multicast stream, the AP drops these packets. It is important to be aware of this behavior when validating multicast operation in a deployment. | Enter the client count number.
Range: 0 through 128. |
| Client tx/Rx Statistics | Stops the controller from monitoring traffic statistics for unauthorized clients. | Select the check box. |
| Inactivity Timeout | Indicates the duration after which idle clients will be disconnected. | Enter the duration in seconds. |
| OFDM Only | Disconnects 802.11b devices to the WLAN and all devices are forced to use higher data rates for more efficient airtime usage. This setting only affects the 2.4GHz radio. OFDM is used by 802.11a/g/n/ac, but is not supported by 802.11b. | Select the check box. |
| BSS Min Rate | Forces client devices to both be closer to the AP and to use higher, more efficient rates when you increase the BSS min rate above the default (all rates) setting. The BSS minimum rate is the lowest data rate supported on the WLAN. When OFDM-only is enabled, it takes higher priority than BSS min rate settings. | Select the option. |
| Mgmt Tx Rate | Sets the transmit rate for management frames type such as beacon and probes. | Select the value. |
| Service Schedule | Controls when the WLAN service is active. The purpose of this setting is to automatically enable or disable a WLAN based on a pre-determined schedule. By default, the service is Always On. Always Off can be checked in order to create a WLAN and apply it, but prevent it from advertising until ready. The"specific" setting allows a configurable schedule based on time of day and days of the week.
NOTE When a service schedule is created it is saved by the SZ and AP using the browser's time zone. When it is enforced bu the AP, the AP will enforce it according to the time zone of the browser when it was configured.
|
Choose the option:
|
| Band Balancing | Disables band balancing only for this WLAN, if you select the check box. | Select the Disable band balancing for this WLAN service check box. |
| Qos Map Set |
Reprioritizes downlink packets based on the configured mappings. When an AP receives a downlink packet, it checks the existing DSCP (L3 QoS) marking, compares it to this map set and then changes the user priority (L2 QoS) values for transmission by the AP. TO configure this feature, select the User Priority (UP) from the table (0-7) and configure the DSCP (0-64) range that will be mapped to this UP. Exceptions can also be added such that the original DSCP and UP tagging are preserved the honored by the AP. |
Select Enable QOS Map Set. |
| SSID Rate Limiting | Enforces an aggregate rate limit for all users of the WLAN. The purpose of this feature is to prevent the combined throughput form all users of an SSID from exceeding this threshold. This feature is different from per-user rate limiting, which enforces the same rate limit for each individual device. | Select Uplink and Downlink check boxes and enter the limiting rate in mbps respectively. Range: 1 mbps through 200 mbps. |
| DNS Server Profile | Allows the AP to inspect DHCP messages and overwrite the DNS server(s) with the DNS server configured in this profile. This allows for policy-based DNS application in which unique users/roles should use a different DNS server than others. | Select a profile from the drop-down menu. Select Disable from the drop-down menu if you want to disable the DNS Server profile for the WLAN service. |
| Precedence Profile | Defines the relative policy assignment priority for some specific settings. For example, if a WLAN is configured to use VLAN 10, and a AAA/role policy is configured for VLAN 20, and a device OS policy is configured for VLAN 30, and a user/device connects to the WLAN matching all of these policies, which VLAN should be assigned? The precedence policy determines which setting takes priority. | Select the option. |
| Client Flow Data Logging | Sends a log message with source MAC, destination MAC, source IP, destination IP, source port, destination port, L4 protocol and AP MAC of each packet session to the external syslog server. This function is provided by the AP syslog client (not the SZ's syslog client), which must be enabled at the zone level in order to support this client flow logging. | Select the check box to log the client-flow data to the external syslog server. Then enable AP syslog functionality from the Zone settings. |
| Transient Client Management | Avoids transient clients from joining the network. | Select the
Enable Transient Client Managementcheck box and set the following parameters:
NOTE Ensure that
Background Scan is enabled.
|
| Airtime Decongestion | Mitigates air-time congestion caused by management frames in high density deployments. | Select the check box. |