Using the controller's Guest Access features, you can provide visitors to your organization limited access to a guest WLAN with configurable guest policies. The following sections describe how to configure guest WLANs and access policies that control guest use of your network.
Each guest WLAN must be associated with a Guest Access service portal, which defines the behavior of the guest WLAN interface. Follow these steps to create a guest access service.
-
Go to
.
-
Select the
Guest Access tab, and then select the zone for which you want to create the portal.
-
Click
Create.
The Create Guest Access Portal page appears.
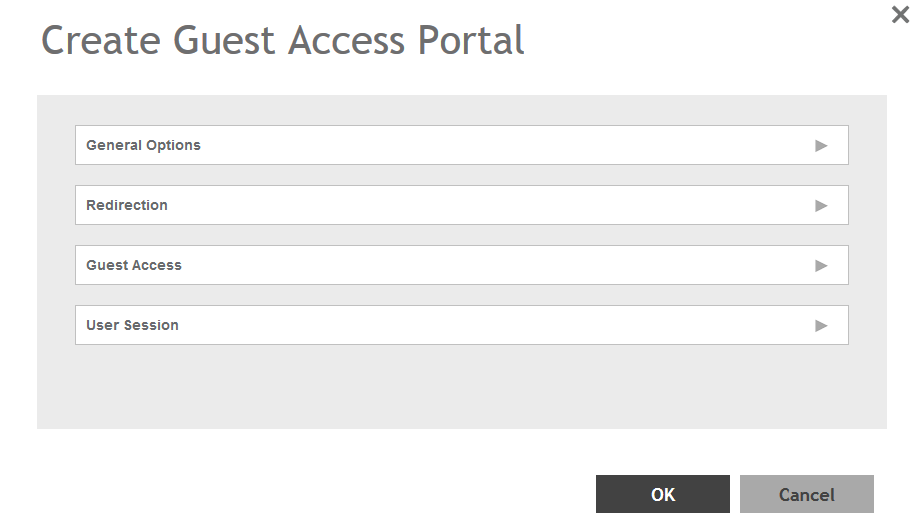
Figure 62
Creating a Guest Access Portal
-
Configure the following:
- General Options
- Portal Name: Type a name for the guest access service portal that you are creating.
- Portal Description: Type a short description of the guest access service portal.
- Language: Select the display language to use for the buttons on the guest access logon page.
- Redirection: select where to redirect the user after successfully completing authentication.
- Redirect to the URL that the user intends to visit: Allows the guest user to continue to their destination without redirection.
- Redirect to the following URL: Redirect the user to a specified web page (entered into the text box) prior to forwarding them to their destination. When guest users land on this page, they are shown the expiration time for their guest pass.
- Guest Access
- Guest Pass SMS Gateway: You can deliver the guest pass to the user using Short Message Service (SMS). But first you need to configure an SMS server. If you previously configured an SMS server, you can select it here or you can select
Disable.
- Terms and Conditions: To require users to read and accept your terms and conditions prior to use,
Show Terms and Conditions check box. The box below, Terms and Conditions which contains the default Terms of Use text, becomes editable. Edit the text or leave it unchanged to use the default text.
- Web Portal Logo: By default, the guest hotspot logon page displays the
Ruckus logo. To use your own logo, click the
Browse button, select your logo Web Portal Logo (recommended size is 138 x 40 pixels, maximum file size is 20KB), and then click
Open.
- Web Portal Title: Type your own guest hotspot welcome text or accept the default welcome text (Welcome to the Guest Access login page).
- User Session
- Session Timeout: Specify a time limit after which users will be disconnected and required to log on again.
- Grace Period: Set the time period during which clients will not need to re-authenticate after getting disconnected from the hotspot. Enter a number (in minutes) between 1 and 14399.
-
Click
OK.
You have completed creating a guest access service.
NOTE
You can also edit, clone and delete a guest access portal by selecting the options
Configure,
Clone and
Delete respectively, from the
Guest Access tab.