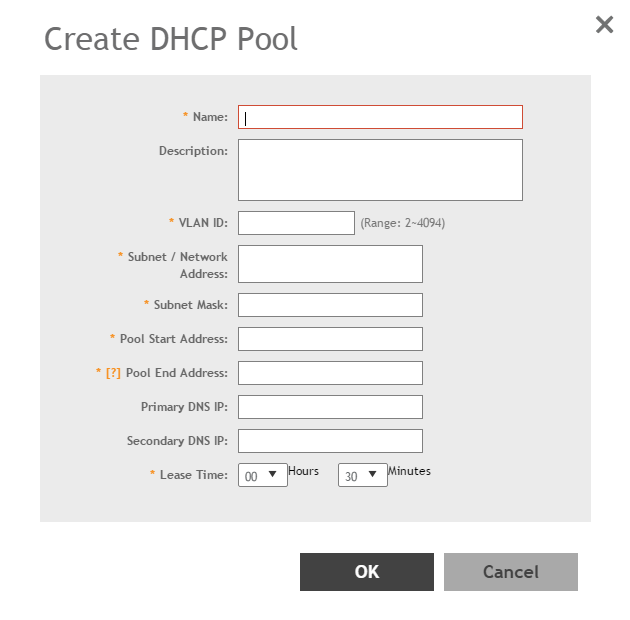
Creating a DHCP pool is necessary for assigning IP addresses to clients. Multiple address pools can be created and assigned to APs that are running DHCP services. Then, when a client connects to the wireless network, it will be assigned an address from the DHCP pool(s) you specified.
To configure a DHCP pool for IP address allocation:
-
Go to
.
-
Select the
DHCP Pools (AP) tab, and then select the zone for which you want to create the pool.
-
Click
Create.
The Create DHCP Pool page appears.
Figure 118
Creating a DHCP Pool
-
Configure the following:
- Name: Type a name for the pool you want to create.
- Description: Type a description of the pool you want to create.
- VLAN ID: Type the vlan id for the pool.
- Subnet Network Address: Type the IP subnet network address (e.g., 192.168.0.0).
- Subnet Mask: Type the subnet mask address (e.g., 255.255.255.0).
- Pool Start Address: Type the first IP address to be allocated to clients from the pool (e.g., 192.168.0.1).
- Pool End Address: Type the last IP address to be allocated to clients from the pool (e.g., 192.168.0.253).
- Primary DNS IP: Type the primary DNS server IP address.
- Secondary DNS IP: Type the secondary DNS server IP address.
- Lease Time: Enter the IP address lease time, after which clients will have to renew or request new IP addresses.
-
Click
OK.
You have created a DHCP address pool. You can now apply this address pool to a DHCP service, as described in
Configuring AP-based DHCP Service Settings.
NOTE
You can also edit, clone and delete the address pool by selecting the options
Configure,
Clone and
Delete respectively, from the
Pool tab.

