Creating Bonjour Fencing Policies
Bonjour Fencing policies can be created and applied to a zone at the same time using the Fencing tab on the Services and Profiles > Bonjour screen.
To create a Bonjour Fencing policy:
-
Click
Create.
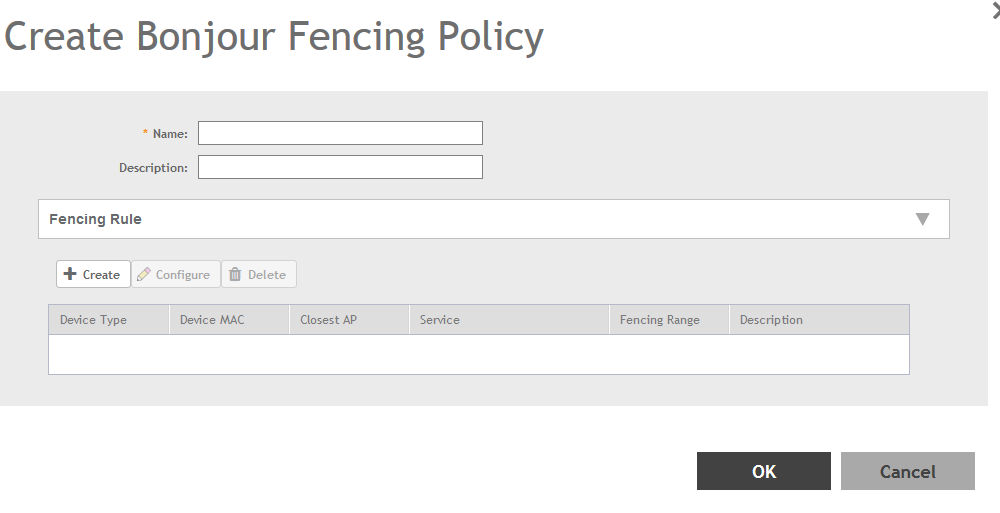
The Create Bonjour Fencing Policy page appears.Figure 99 Creating a Bonjour Fencing Policy
-
Configure the following:
- Name: Type a name for the policy.
- Description: Type a description for the policy.
- Fencing Rule: Create the policy rule by configuring the following:
Figure 100 Fencing Rule
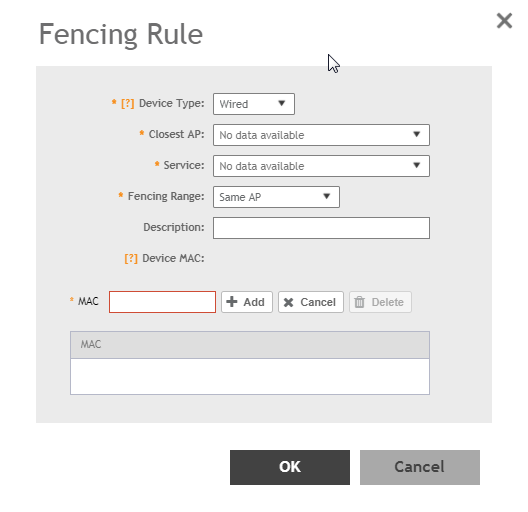
- Click Create. The Fencing Rule page appears.
- Configure the following options:
- Device Type: Select the Wireless or Wired network connection method for the device advertising bonjour services.
- Closest AP: Select the closest AP to create a physical anchor point for fencing, and the closest AP is auto-detected for wireless devices, based on the AP association.
- Service: Select one of the bonjour services from the drop-down list.
- Fencing Range: Select the fencing range to be the Same AP or 1-Hop AP Neighbors.
- Description: Specify any notes you may need to refer.
- Device MAC: Specify the MAC address of the device advertising bonjour services. This option is available only for Wired Device Type. It supports up to four wired MAC addresses.
- Click
OK to save the rule.
You have created a Bonjour fencing rule. Each policy can contain up to 32 rules.
- Click OK to save the policy.
You have created a Bonjour fencing policy.
NOTE
You can also edit, clone and delete the policy by selecting the options
Configure,
Clone and
Delete respectively, from the
Fencing tab.