Replacing System Fans
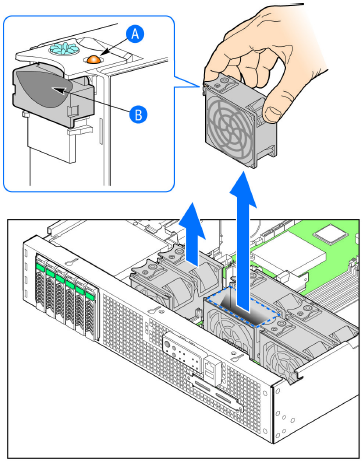
The controller includes six redundant, hot-swappable system fans (four 80mm fans and two 60mm fans). There are also two fans located inside the power supply units. Redundancy for the two PSU fans is only achieved when both PSUs are installed.
If any of the system fans requires replacement, the replacement procedure is identical.
Electrostatic discharge (ESD) can damage internal components such as printed circuit boards and other parts. Ruckus recommends that you only perform this procedure with adequate ESD protection. At a minimum, wear an anti-static wrist strap attached to the ESD ground strap attachment on the front panel of the chassis.
Follow these steps to replace a system fan.
-
Close the front chassis cover and return the controller to its normal position in the rack, if necessary.
Figure 160 Replacing a system fan