Creating an AP Group
Creating an AP group means creating a configuration profile that defines the channels, radio settings, Ethernet ports and other configurable fields for all members of the group or for all APs of a specific model in the group.
Follow these steps to create an AP group.
- From the left pane, select
Access Points. The below figure appears.
Figure 36 Access Point
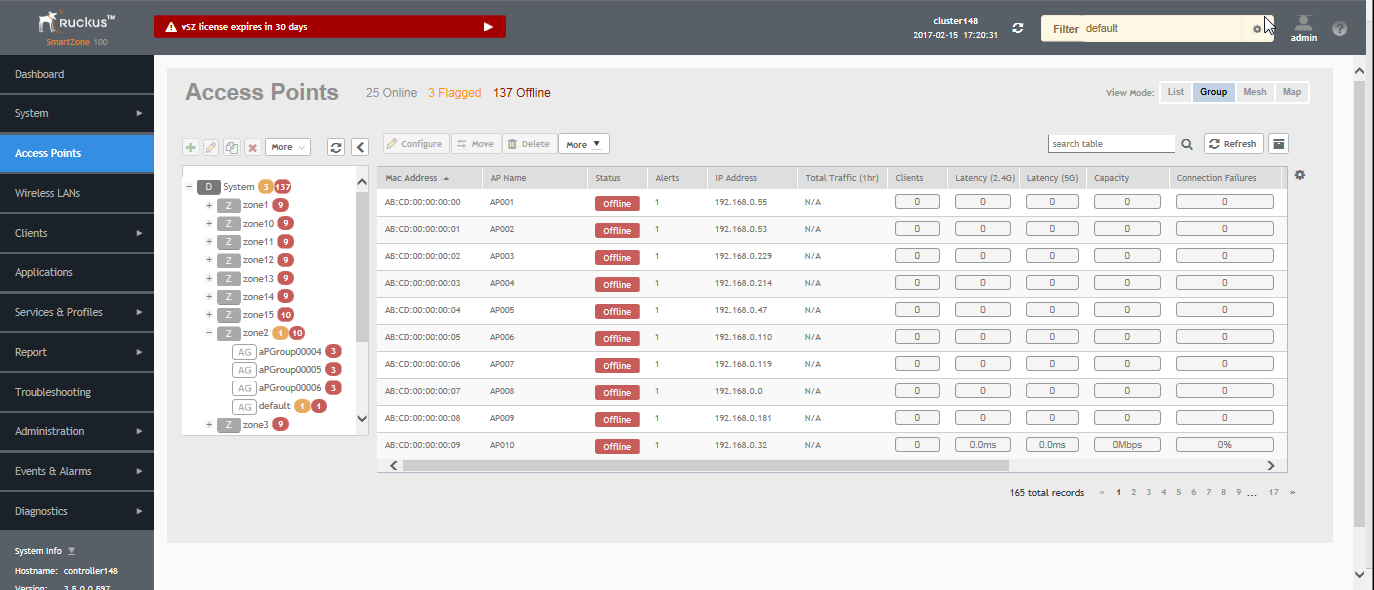
- From the System tree hierarchy, select the location (for example: System, Domain, Zone) and click
 . The following figure appears.
Figure 37 Create Groups
. The following figure appears.
Figure 37 Create Groups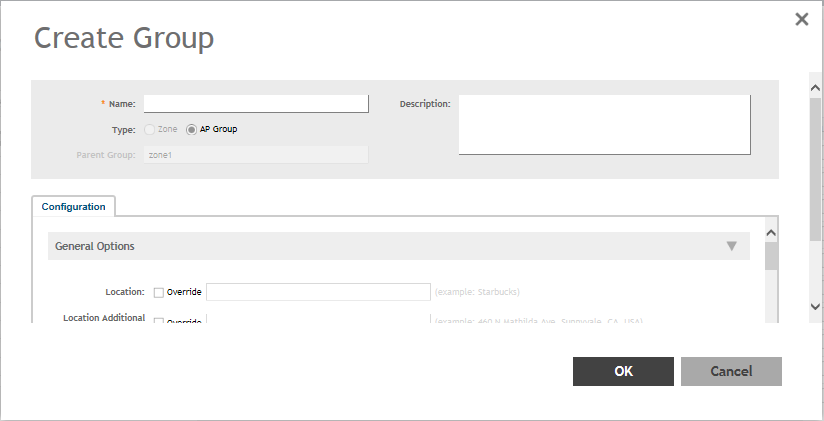
- Enter the details as explained in the following table.
NOTEYou can also edit the configuration of default APs by selecting the AP and clicking the
 icon.
icon.
- Click OK.
| Field | Description | Your Action |
|---|---|---|
| Name | Indicates a name for the Zone/AP group. | Enter a name. |
| Description | Indicates a short description. | Enter a brief description |
| Type | Indicates if you are creating a domain, zone or an AP group. | Appears by default. You can also choose the option. |
| Parent Group | Indicates the parent group that this AP group belongs. | Appears by default. |
| Configuration > General Options | ||
| Location | Indicates generic location. | Enter the location. |
| Location Additional Information | Indicates detailed location. | Enter additional location information. |
| GPS Coordinates | Indicates the geographical location. | Enter the following coordinates in meters or floor:
|
| Configuration > Group Members | ||
| Members | Displays the list of APs that belong to the group. | Select the members from the list and click Move to to assign them to the required group. |
| Access Points | Displays the list of APs that belong to the zone. | Select the Access Points from the list and click Add to Group. |
| Configuration > Radio Options | ||
| Channel Range (2.4G) | Indicates that you want to override the 2.4GHz channel range that has been configured for the zone to which this AP group belong. | Select Select Channel Range (2.4G) check boxes for the channels on which you want the 2.4GHz radios of managed APs to operate. Channel options include channels 1 to 11. By default, all channels are selected. |
| 5.8 Ghz Channels |
Provides C-band support for all Outdoor APs and the following Indoor APs: R310, R510, R710. NOTE
This feature is available only for countries that support 5.8Ghz channel. For example, UK provides indoor AP—5.8Ghz channel support. |
Select the Allow 5.8Ghz channels check box. |
| 5.8 Ghz Channels License |
Enables full TX Power Adjustment for C-band channels.
NOTE This feature is supported only for UK.
|
Select the Allow 5.8Ghz channels use full power check box. |
| Channel Range (5G) Indoor | Indicates for what channels want the 5GHz radios of managed indoor APs to operate. | Select the check boxes. |
| Channel Range (5G) Outdoor | Indicates for what channels want the 5GHz radios of managed outdoor APs to operate. | Select the check boxes. |
| Radio Options b/g/n (2.4 GHz) | Indicates the radio option 2.4 GHz configurations. | Select the following options:
|
| Radio Options a/n/ac (5 GHz) | Indicates the radio option 5 GHz configurations. | Select the following options:
|
| Configuration > AP SNMP Options | ||
| Override zone configuration | Indicates that the AP Group configuration overrides the zone configuration. | Select the check box. |
| Enable AP SNMP | Indicates if the AP SNMP option is enabled. | Select the check box. |
| SNMPv2 Agent | Indicates SNMPv2 Agent is applied. |
|
| SNMPv3 Agent | Indicates SNMPv3 Agent is applied. |
|
| Configuration > Model Specific Options
NOTE Select the
Override check box for that setting, and then configure the setting.
|
||
| AP Model | Indicate the AP model for which you are configuring. | Select the option. |
| Status LEDs | Disable the status LED on the selected AP model. | Select the option. |
| LLDP | Enables the Link Layer Discovery Protocol (LLDP) on the selected AP model. | Select the option and enter the following details:
|
| External Antenna (2.4 GHz) | Enables the external 2.4 GHz antenna on the selected AP model. | Select the Enable external antenna check box, and then set the gain value (between 0 and 90dBi) in the box provided. |
| External Antenna (5 GHz) | Enables the external 5 GHz antenna on the selected AP model. | Select the Enable external antenna check box, and then set the gain value (between 0 and 90dBi) in the box provided. |
| Port Settings | Indicates the port settings. | Select the option and choose the required LAN option. |
| PoE out port | Enables PoE out mode. | Select the Enable PoE out ports (specific ZoneFlex AP models only) check box. |
| PoE Operating Mode | Indicates the PoE operating mode of the selected AP model | Choose the option.
NOTE When this option is selected, some AP features are disabled to reduce power consumption, such as the USB port and one of the Ethernet ports.
|
| Internal Heater | Enables the heater that is built into the selected AP model | Select the Enable internal heaters (specific AP models only) check box. |
| USB Port | Disables the USB port. USB ports are enabled by default. | Select the Disable USB port check box. |
| Configuration > Advanced Options | ||
| Location Based Service | Enables location-based service for the AP group. |
|
| Hotspot 2.0 Venue Profile | Indicates the hotspot profile that you want to assign to the group. | Select the required option or click
Create and update the following details:
|
| AP Management VLAN | Indicates the AP management VLAN settings. | Choose the option. Click VLAN ID, and then type the VLAN ID that you want to assign (valid range is from 1 to 4094). To keep the same management VLAN ID that has been configured on the AP, click Keep AP's settings. |
| Auto Channel Selection | Indicates auto-channel settings. | Select the check box and choose the option. |
| Client Admission Control | Indicates the load thresholds on the AP at which it will stop accepting new clients. | Select the
Override check box respective to
2.4 GHz Radio or
5 GHz Radio and update the following details:
|
| Protection Mode |
Indicates the mechanism to reduce frame collision. |
Choose one of the following options:
|
NOTE
You can also edit, clone or delete an AP Group by selecting the options Configure
 , Clone
 or Delete
 respectively, from the Access Points page.