Creating Realm Based Authentication Profile
An authentication profile defines the authentication policy when the controller is used as a Radius proxy service for WLANs.
- Go to Services & Profiles > Authentication.
- Select the Realm Based Proxy tab, and then select the zone for which you want to create the profile.
-
Click Create.
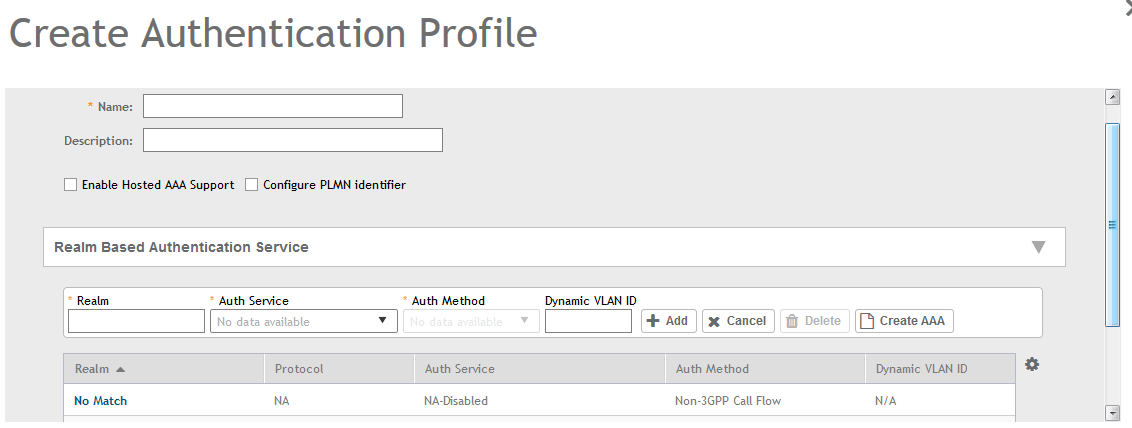
The Create Authentication Profile page appears.Figure 97 Creating a Realm Based Proxy Authentication Profile
-
Configure the following:
- Name: Type a name for the authentication service profile that you are creating.
- Description: Type a short description of the authentication service profile.
- To enable hosted AAA support, select the Enable Hosted AAA
Support check box, and then configure these options:
- Interim Accounting Interval (secs): Set the interim time interval for RADIUS clients to send accounting updates. Default is 0, which indicates that the accounting interval is disabled.
- Sessions Timeout (secs): Set a time limit after which users will be disconnected and required to log on again.
- Session Idle Timeout (secs): Set a value in seconds (60 to 600) after which idle clients will be disconnected.
- Select the Configure PLMN Identifier check-box, and set the
following options:
- Mobile Country Code: Set the correct country code for the geographical location. This is required when the controller sends MAP authentication information to the HLR.
- Mobile Network Code: Set the mobile network code based on the geographical location. This is required when the controller sends MAP authentication information to HLR.
- Realm-Based Authentication Service
- Realm: Type wthere the realm is No Match or Unspecified.
- Auth Service: Select a default authentication service for the realm.
- Auth Method: Select an authorization method as 3GPP or Non-3GPP call flow.
- Dynamic VLAN ID: Type the vlan ID.
- Redirection: select where to redirect the user after successfully completing
authentication.
- Redirect to the URL that the user intends to visit: Allows the guest user to continue to their destination without redirection.
- Redirect to the following URL: Redirect the user to a specified web page (entered into the text box) prior to forwarding them to their destination. When guest users land on this page, they are shown the expiration time for their guest pass.
- Click OK.
Parent topic: Authentication