Using the Web Management Interface

The following procedure explains in detail about using the Web Management Interface.

  1. Click the plus sign (+) next to Configure in the tree view to expand the list of configuration options.
  2. Click the plus sign (+) next to System in the tree view to expand the list of system configuration links.
  3. Click the plus sign (+) next to Management in the tree view to expand the list of system management links.
  4. Click Authentication Methods to display the Authentication Method panel.
  5. Enable or disable elements on the Web Management Interface by clicking the appropriate options on the panel. The figure below identifies the elements you can change.
    Figure 5  Web Management Interface elements
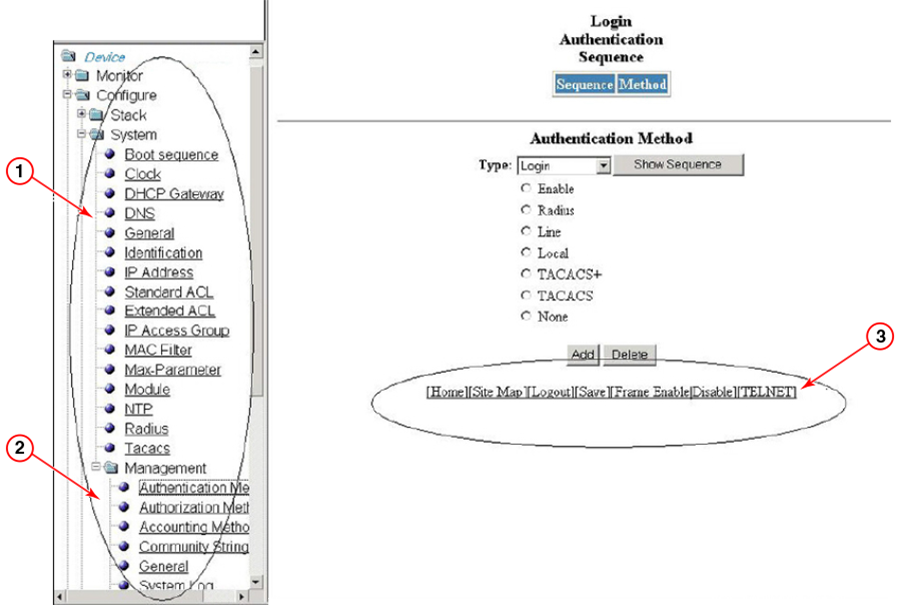
    1. Menu Type (Tree view)
    2. Menu Frame
    3. Shortcut links
    NOTE
    The tree view is available when you use the Web Management Interface with Netscape 4.0 or higher or Internet Explorer 4.0 or higher. If you use the Web Management Interface with an older browser, the Web Management Interface displays the list view only, and the Web Management Preferences panel does not include an option to display the tree view.
  6. When you have finished, click Add on the panel to add the authentication types. Click Delete to remove authentication types.
  7. To save the configuration, click the plus sign (+) next to the Command folder, and then click Save to Flash.
    NOTE
    The only changes that become permanent are the settings to the Menu Type and the Panel Frame. Any other elements you enable or disable will go back to their default settings the next time you start the Web Management Interface.